Using salt can be very beneficial, whether it is used internally or by transdermal application. You can use the valuable properties of the salt by adding it into your homemade soap. By adding salt in the regular soap bar, you will make a gentle exfoliator and will have a luxurious soap bar for everyday use.
Make sure you previously gather information on how to make soap home so that you are prepared of the process.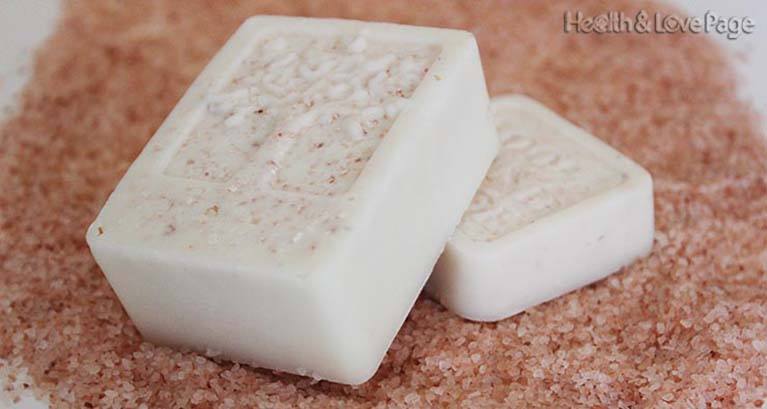
This is a variation of the traditional soapmaking so you need to be aware of some things. One of them is understanding some facts about adding salt in the soap.
Adapt The Recipe
First, you need to adopt the soap recipe before adding any salt. Immediately after you add the salt, soap will reduce the lathering abilities of the usual soap recipe. For you to prevent this, increase the amount of coconut oil to 70%.
The big and fluffy bubbles of the coconut oil will give the soap bars a nice lather, but be aware that it can be very drying if used in high amounts. Use somewhere between 15 to 50% together with five to eight percent of superfat.
In this recipe the coconut oil is 70%, so the superfat will increase to 15%. In this way the soap will not dry your hands and it might be a little bit slippery. Try a lower percentage of superfat if you want, but make sure you calculate the recipe once again so that the lye amount is correct.
What Kind Of Salt to Use for Soap?
We all ask this but, the real question is what kind of salt not to use. Epsom salt and Dead Sea salt are not recommended for this use. Epsom salt consists too much magnesium whereas Dead Sea salt is high in minerals. Using these kinds of salt will make the soap sweaty and weepy because of the moisture they draw from the air.
An amazing choice would be Pink Himalayan salt or Sea salt. It is on you whether the salt grain will be big or small. If you prefer, you can use fine grain, in this recipe the salt is large grained. Dissolve the salt in warm water so that it is not too rough or sharp on the skin.
How Much Sea Salt?
There is no exact measure for the salt added in the recipe. Between 50 to 100% of soaping oils are used. It is more recommended to use 50% for an everyday usage of the soap, because if the amount of soaping oils is higher then after every wash your hands will be dry. When the amount of salt is high it makes an excellent soap bar for shower.
The number of the oils is measured just for the weight of them, without the water and lye. For instance, if you want 100% oils you should use 32 oz of salt for the same amount of oils.
Adding Salt and Molding
You should add the salt after the mixture of lye and water is stirred and the soap reached trace. You need to pour it in the mixture and stir using the spoon. It will set really quickly when the salt is added, so you need to move the spoon fast. Probably, the soap will need to be spoon in the molds rather than pour it inside.
When using the traditional log mold, the salt bars need to be get out of the mold and cut an hour after they are poured in it. The soap will get hard very quickly and when waiting too long it will harden so much that it will start to crumble when you cut it.
A more easier option are the individual cavity silicone molds. You can leave it overnight and they will pop out without any struggle.
SoapMaking Supplies
There is a set of supplies you need to keep on hand when making soap. The kitchen tools are great if you enjoy cleaning them after the process, but it is better if you use separate ones.
- Two glass canning jars (one for mixing water and lye and one for measuring oils)
- Slowcooker or nonreactive pot (for warming oils)
- Two candy thermometers or one digital infrared thermometer
- Wooden or silicone soap mold
- Digital scale
- Immersion blender
- Spatula
- One spoon
- Protective gloves
- Some vinegar for cleaning at the end
Sea Salt Soap Ingredients
For the recipe you will need the ingredients that are measured by weight. It has 15% superfat and it makes two lbs of soap.
- 8 oz Himalayan sea salt
- 11 oz coconut oil
- 1 oz mango butter
- 3 oz olive oil
- 1 oz Castor oil
- 2.3 oz lye
- 6 oz distilled water
- 0.5 oz lavender essential oil
Sea Salt Soap Instructions
- If you use wood mold line it with wax paper. When using silicone mold there is no need for special preparation.
- Put the glass canning jar on the scale and tare it. Into the jar, pour the distilled water until the scale reads 6 oz and set it aside.
- Once again use the scale for the second jar and tare it. Put on the protective gear and pour the lye carefully in the jar until the scale reads 2.3 oz.
- Bring the two jars outside your home. Pour the lye slowly to the water, wearing the protective gear. Use the spoon to mix them together and bear in mind that this is hot. Leave it to cool down to approximately 100 degrees.
- Until you wait for the lye to cool, take the oils and measure them except for the essential oils, then warm them in a slowcooker or a pot. When the oils are melted, remove them from the heat and leave it cool down to 100 degrees. You can test the temperature with an infrared thermometer in every five or ten minutes. Alternatively, you can use a candy thermometer in every container. If one of the jars is cooling faster than the other, then you can heat them placing the jar with the oils on the heat or the jar with the mixture of lye and water in the warm water in order to slow down the process of cooling. It should be as ideal as possible, both jars to 100 degrees and within 10 degrees of each.
- Once you managed to match the temperatures, pour the mixture of water and lye to the oils. Bring the batter to light, using immersion blender. It should resemble like cake batter and be slightly thick.
- This is the time when you need to add the essential oil. To combine the essential oils, pulse several times with the blender. If you don’t like to use essential oils then skip this.
- Now add the salt and stir well until the mixture is even.
- Use the spoon to put the soap batter in the already prepared molds. Make sure you still wear the gear, since the soap is not cooked yet and can irritate the skin very easily.
- You are finished if the mold is made of silicone and has individual cavities. Wait for 24 hours and get the bar soap out from the mold.
- Using a log style mold needs more care since it needs about an hour to set the soap and you need to cut it into bars. React quickly, because the soap will dry after a long time and it will not cut.
- Place the bars in a dry area with an inch of space between them so that the air can circulate and they should sit four or six weeks. With this the process of making the soap will be completed and will last much longer than any market one.
The soap is great if you have oily skin. This recipe is excellent if you prefer more exfoliating soap than the normal bar.
Via: Country Hill Cottage